Monday, March 16, 2020

Planting Day!


Plants get to go in the field today! A lot of work led up to today and we'll finally get to see the garden start!


The first step is to broadfork the soil with the tool you see in the right of this photo. It gets stuck in the ground and then you pull back on the handles to pop open a big chunk of soil. The idea here is to break open the soil to let in air/moisture/nutrients but doing so without mixing up or tilling the soil. The broadfork creates deep vertical breaks in the soil but doesn't stir the layers.

Then, we put compost on the soil to feed the plants. This is ORMI listed organic compost we buy from our supplier in Wisconsin. I still don't like the giant plastic bags but this is great material.


The next step is to power-harrow the surface of the soil to incorporate the compost and break up chunks which would otherwise make it difficult to plan the seedling plugs. This implement uses vertical knives to stir only the top couple inches of soil where the compost is mixed in. We avoid tilling any deeper than this so that the soil structure is maintained.


Some of our plants are covered with re-usable landscape fabric so that we don't need to weed them. We've made plywood templates that we can lay on the fabric to quickly burn the holes on equally spaced patterns. 


We're planting Kale, Broccoli and Swiss Chard, while they are somewhat cold hardy, we need to put row-cover protection on them to keep the frost off. 
First we need metal hoops for the row cover. It works out great that the as-shipped coil diameter is about right to make one cut straight through the coil, producing a whole stack of hoops that are just the right size.


We work down the rows, installing hoops every five feet or so. Here you can also see the landscape fabric with the plants in there.


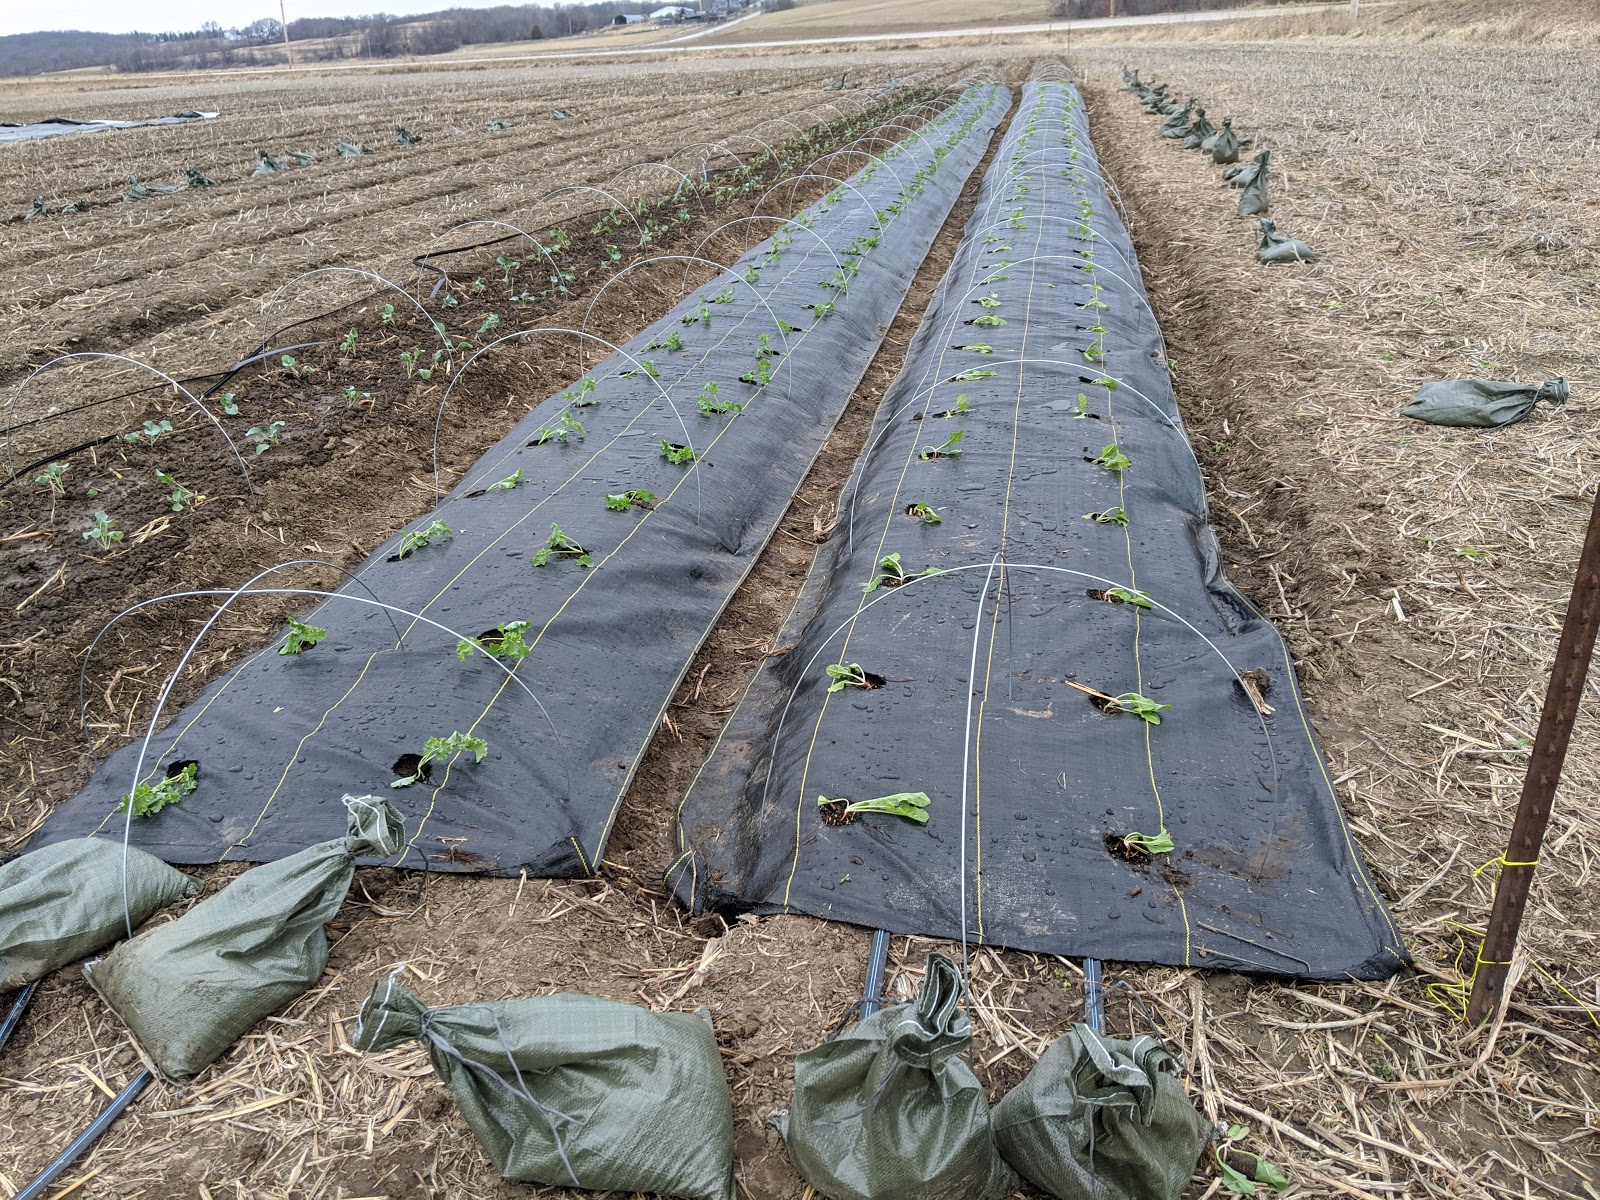
We stretch out some row cover off a roll and sand-bag it down. We've learned from the silage tarps that the correct quantity of sand-bags is always: a lot.


There are different widths of covers so we can save time and sandbags by combining like items.


Saturday, March 7, 2020

Making the bed.


The two-wheel tractor has sat dormant since Fall, basically still unused. It got a big test today, we hilled most of our raised beds!

We're using a guide-wire clamped to the machine, following string-lines to get the beds and aisles reasonably straight. The better job we can do of straight/square, the easier it will be to put on row-covers and tarps etc.


This machine handles pretty well and has features like individual wheel-brakes which aid with turning etc. but I was definitely worn out after we had this job done. We made 94 raised beds and it takes two passes for each bed - I plowed 188 100ft-long rows!


Here's a closer shot of the rotary plow. It basically cuts a trench in the ground and throws the dirt to the right side. By doing two passes on each bed, this creates a walking aisle and piles up several inches of dirt across the 30"-wide growing bed.


Here's the finished product. Hours of planning and measuring were well spent ahead of the plowing.


Our last step was to put a silage tarp down over the beds we'd be planting next. This keeps the soil dry, kills weeds and encourages earthworms to process the soil near the surface.


Sunday, March 1, 2020

Spring is near!


Spring is just around the corner! We had a few really cold nights as Winter hung on. We used drop material from the greenhouse roof to make a curtain inside, shortening the building up by 16'. This helped greatly with keeping our seedlings warm.


Lots of green! Our first plantings were mostly flowers so it will be exiting to see these all blooming at the same time.


Improved daytime weather means the chickens like to spend a lot more time outside. There aren't many greens for them yet but they seem to be finding a lot of bugs. 


Saturday, February 22, 2020

Water, water everywhere.


We've been trucking irrigation water from the city treatment plant for a year now and thus have become ecstatic at the prospect of water supplied simply by turning a valve on. 

Greiner Pump and Well came out to install our pump and controls. It was a beautiful day for a project. 
In a struggle similar to the discovery process of finding a well driller, we had to do some looking to find Greiner. We've been starting local and then growing our search radius as people no-quote and tell us they aren't interested in the project. We're glad these guys were willing to travel all the way from Keota! 


Here's our new pump and motor - lots and lots of stainless-steel! The motor is 5hp -3phase and the pump-end has 16 stages.


Here's our pump control room currently. I'm making an insulated enclosure for this area so that it can be heated next winter.

We opted for a VFD (variable frequency) 3-phase motor drive. It was significantly more expensive than a regular on/off control but it allows the pump to generate any flow required without slamming on and off (a problem when the pump is very large). 
The VFD has a pressure transducer on the output manifold for monitoring line pressure. The control will then run the pump motor at any rpm required to hold the manifold at the preset pressure. We can crack open a faucet to a tiny trickle and the motor will just barely turn to meet the demand.

This design just makes sense to me in general and has other benefits such as the floor space consumed by pressure tanks. We were able to use a small 30-gallon pressure tank, which only has the job of providing some water flow for the 1/2-second or so that the pump takes to start.
The pump guys had calculated the necessary pressure tank size for a conventional on/off control of this flow rate and it would have been 500-gallons! A lot of the reason for this difference is that most motor damage/wear is from excessive start cycles. 
If I had a conventional on/off system and was just opening a faucet to a trickle, this huge pump would slam on, instantly provide a large volume of flow that has to go somewhere (into the pressure tank) then, it would shut right back off, repeating the cycle over and over. A huge tank would be needed so that the pump could at least stay on for a minute or two. The VFD eliminates all of that.

Kudos to the Greiner crew for surviving the pipe installation process! My concrete floor appeared to be roughly 12" thick with a 24" wide footing along both sides - that's a 6" PVC conduit that they had to run through it! I guess concrete was either really cheap or really easy to make in 1948 when this building was put up.


Here's the capped and finished well casing out back, I thought it turned out pretty good. We've had a few rains since which have helped to settle out the dirt so I can figure out where the grade needs to be.


Eager to get our greenhouse storage-tank filled, I rolled out our brand new fire-hoses. We opened the valve up and noticed one of the hoses had a 1" rip in the side. The well has so much flow that it was still filling the greenhouse tank at a VERY fast rate despite the leak blowing out in the yard. A problem for a different day.


Thursday, February 13, 2020

Well, Well, Well


We had exciting work going on at the farm this past Monday. A little before noon, several big trucks came up the drive. The well drillers had arrived! 

We didn't expect this project to be started for another month but there was evidently an issue with another job. The crew asked if we were ready now - you bet! We've been planning the irrigation well since Summer, doing field layouts and system design with an irrigation company, and searching for someone who would actually take the drill job. We needed 75 gallons per minute flow, which caused two local companies to decline attempting it. 
Reaching out a little farther, we used Gingrich from Kalona. These guys were great in every way. 

We were still a little concerned in the beginning, after a site survey. The result was: "If you were one mile North I'd no-quote it, but down here in the bottom, we've got some possibilities." Evidently there's a stone shelf coming out of the bluffs to the North of us and the ideal water location is under there. There would be no way to know if we'd get the water we need until the drill is in the ground. We were hoping for maybe 50% of our requested flow and plan-B was to adjust the irrigation layout accordingly.


I pulled in the driveway for lunch and found this welcome sight. The truck on the right is carrying the drill rig and the truck on the left is a dedicated tanker which carries all the water needed for boring lubricant and final flushing. I'd say the water truck was 1,500-2,000 gallons capacity or so.


The drill rig was pretty big. The building to the left is over 20' tall for reference. There is a trailer to the right in the picture which was carrying the casing tubing, grouting sand, and drill fluid mix. The first job is to drill a 3" pilot hole to find out if the water is at the expected location. If not, the well has to be abandoned and plugged.


Huge relief, the water was there! We were thrilled after expecting to see 50 gallons per minute output, the well actually test pumped at 90 gallons per minute!
Here's a shot of the primary casing drill bit. It makes a hole roughly 12" diameter. The spiked wheels on the end rotate and the truck's pumps force water down the center of the bit while drilling.


This is the suction screen which goes in the bottom of the hole. It is slotted stainless steel and keeps the larger sand particles from getting to the pump. The pump will go down inside this tube, which is about 8' long and it's 8" diameter. This well is cased at 8" and will use a 4" pump. I'm quite intrigued by the design of submersible well pumps. Due to limitations on the diameter of the casing, pump companies have to design quite large pumps which fit in a relatively narrow cylinder. Our pump and motor assembly will be almost 72" long but only 4" diameter!


Here's a short video of some flushing done to clear any debris from inside the well casing. The whole system will be sanitized when the pump is installed and eventually tested by a sanitarian who is certified to test for the USDA, as required for organic certification. Marion county can't test for the USDA requirement but Mahaska county has someone who can, so that shouldn't be an issue down the road.

Thursday, February 6, 2020

Dirt Bags

Our shipment of dirt and compost has arrived! There are 15x super-sacks holding two cubic-yards each. It was a 35,000 lb load. This should be enough to get us through 2020.

A large amount (12x bags) is compost for field amendments. This will be spread on the raised beds as we build and plant them. The remaining three bags are seed starting mix and soil for "potting-up" the starts to larger pots.

All of these items are OMRI listed and certified organic. This is required for our supply-chain management to ensure our own organic certification eligibility in the future.

I'm not real pleased with the amount of plastic film required to ship these. We might explore bulk shipping (like a dump-truck), if available, in the future. I imagine it's difficult to bulk ship certified-organic items when there might be non-organic items remaining in the truck box from the previous shipment or some other contamination.

We're excited! It's snowing today but we still think of field work!


Tuesday, February 4, 2020

New Arrivals


The baby chicks are starting to come in! We have 30 new ones today and another 25 due in next week. There has been a big demand for eggs so we've added as many birds as we can to our coop arrangements. We may have to plan for a building expansion next year.

This new flock will be similar to the current producers which is a wide variety, producing all sorts of egg colors.